Pine vs Oak: Which Wood is Best for Your Home Improvement Project?
Installing shiplap on your walls or ceiling is something most DIYers can accomplish. But is it possible to get that professional, nail-free look without hiring a contractor?
In short, yes. It’ll take the right tools, a bit of research, and a good measure of patience. But that’s it. This is your chance to transform wood planks into something extraordinary, and you won’t need magic to do it… just a few helpful tricks up your sleeve!
Giving walls or ceilings a rustic farmhouse charm is easy to do with shiplap. But do you have to hire professionals? And if not, how can DIYers get professional results? Let’s dig in and find out.
A couple of tools and materials you’ll need before embarking on your shiplap journey:
Pro-tip: Purchase your wood planks well before you need to install them, and store the planks in the area they’ll be used. This helps them adjust to your environment so warping won’t be an issue when it’s time to install.
Measuring twice is a great tip for any DIY project, but it won’t do much unless it’s paired with proper cutting. Safe use of power tools can ensure nice, clean cuts for each board – making them fit together seamlessly to create that look you’d expect from shiplap.
Remember: Safety first. Be sure to wear proper PPE (personal protective equipment) before starting your project. When it comes to installing shiplap, PPE might include safety glasses, gloves, and a safe step ladder.
Use high-grit sandpaper on a palm sander to smooth down edges on your boards. If you plan on painting after installing, be sure to pay special attention to any imperfections or uneven areas.
Did you know? Smooth edges and surfaces can prevent water seepage from occurring, which could otherwise damage boards down the road.
If you plan on painting your shiplap, choosing the right color for your space is a game-changer. Bold colors can transform a room, and classic white or gray paint give spaces that rustic, farmhouse feel.
The question of what color to paint your shiplap isn’t always easy to answer. This largely depends on the vibe you’re going for in your space, as well as other design elements and decor.
White is often favored since it gives that bright, airy feel commonly associated with shiplap. It’s no surprise that white shiplap boards have gained popularity in shows like HGTV’s Fixer Upper. But you don’t have to stick with traditional paints! Installing shiplap is the perfect time to let your creativity shine through.
If white paint doesn’t fit with the design plan in your mind, you might consider options like gray or natural wood finishes. These can add warmth and charm without detracting from other design elements.

Whatever shade of paint you choose, shiplap can pair great with it.
Pro-tip: Test out a few colors before committing fully. Paint swatches directly onto small sections of spare boards to see how they appear in your space after drying. Lighting conditions vary from room to room, which can alter how shades appear.
Spraying:
For a perfect finish, spraying is the ideal method to ensure an even coat and avoid paint drips or brush marks. This is especially important when working with shiplap’s nickel gaps, which can be difficult to reach with rollers or brushes.
Rolling:
Though it might take a bit more effort (and patience!), painting with a brush and roller can work. Just be sure to buy high quality brushes and cover each board thoroughly.
If you’re like me, the idea of using a nail gun or electric saw might make you wonder “should I hire a professional instead?” Don’t worry – we’ve got you covered with some helpful tips.
Instead of traditional installation methods using nail guns and saws, adhesive strips can be used to attach shiplap boards to walls. The advantage here is twofold: Not only does adhesive prevent any visible nail holes from ruining your aesthetic – it also saves time since there’s no need to patch or fill any misfires from a nail gun.
Rather than using an electric saw to cut each board down to size, consider purchasing pre-cut planks at your local hardware store. You may have to cut a couple (or have a store employee cut them for you) to fit oddly-shaped areas, but finding the right sizes for your space might be easier than you think!
A common concern when installing shiplap is ensuring it looks professional despite not having the skills of an experienced carpenter. The solution? Careful planning and measuring before starting your installation.
When marking spots for plank placement, be sure to take into account light fixtures and other obstacles. This will save a lot of time during installation, especially if you aren’t planning on doing much cutting yourself.
Another aspect to a professional look is staggering your planks as you work across a wall or ceiling. By starting each row with different board lengths, you’ll achieve a seamless finish that mimics professional installation.
Did you know? A staggered installation pattern not only enhances the aesthetic appeal of your shiplap – it helps with stability, too!
Cutting shiplap boards with precision and staggering them is vital to achieving that seamless, professional look you might see on Pinterest or HGTV. And don’t let these steps scare you! It’s simpler than it appears. With a few tools (like scissors or an Exacto knife), you’ll have perfectly sized planks in no time.
The first step towards cutting your shiplap boards is choosing the right tool. If you’re not using an electric saw, a pair of sharp, sturdy scissors can work great on thin boards. For more intricate cuts, grab an Exacto knife. You might be surprised at how handy these simple tools can turn out to be when you need control over detailed work.
As is the case with any project involving cutting, proper technique can’t be emphasized enough. Wear safety goggles and cut-resistant gloves, always cut away from yourself, and remember – patience is key. Saving a few minutes now may cost more time later.
Avoid repeating patterns by staggering placement of your shiplap planks across your wall or ceiling. Staggered boards help break up lines along the seams, leaving you with a professional result. Check out this post for a few designs if you need inspiration!
Staggering is easy. To start, measure each board length before placing them onto your accent wall or ceiling, ensuring there’s no repeat patterns down the line. Once you’ve planned out your placement, secure each piece.
When it comes to staggering shiplap boards, perfection isn’t always the goal. In fact, little imperfections in lengths can actually add to the charm of your living space. Play around with the measurements and placement and enjoy it! That’s what shiplap is all about.
The process of installing peel and stick shiplap on an accent wall is straightforward and is a great way to achieve a professional look without breaking the bank.
To start, measure your work area. You'll need the dimensions for later when you cut your wood boards.
A tape measure can give precise measurements. Make sure to double-check your measurements before moving onto the next step.
Your measured dimensions will guide you in cutting the wood boards.
Using a saw, carefully trim each board according to your needs. If you aren’t comfortable with power tools (or if you don’t need that many cuts), consider having a local hardware store cut pieces down to size. In most areas, you can find pre-cut boards in a variety of widths, too.
Mounting tape is a great way to ensure professional results when working with peel and stick boards. It’s a great alternative to nails, and guarantees a uniform attachment throughout the project.
The key to getting shiplap installed without nails showing lies in applying mounting tape effectively. It's a great alternative that secures attachment of your shiplap boards while maintaining aesthetics.
Once you peel off the protective layer and have your board in place, press down firmly onto your chosen wall or ceiling. And voila. You’re done – so enjoy your transformed home.
Additional tip: If you're installing around a light switch or outlet, use painters tape to protect the area and make precise cuts.
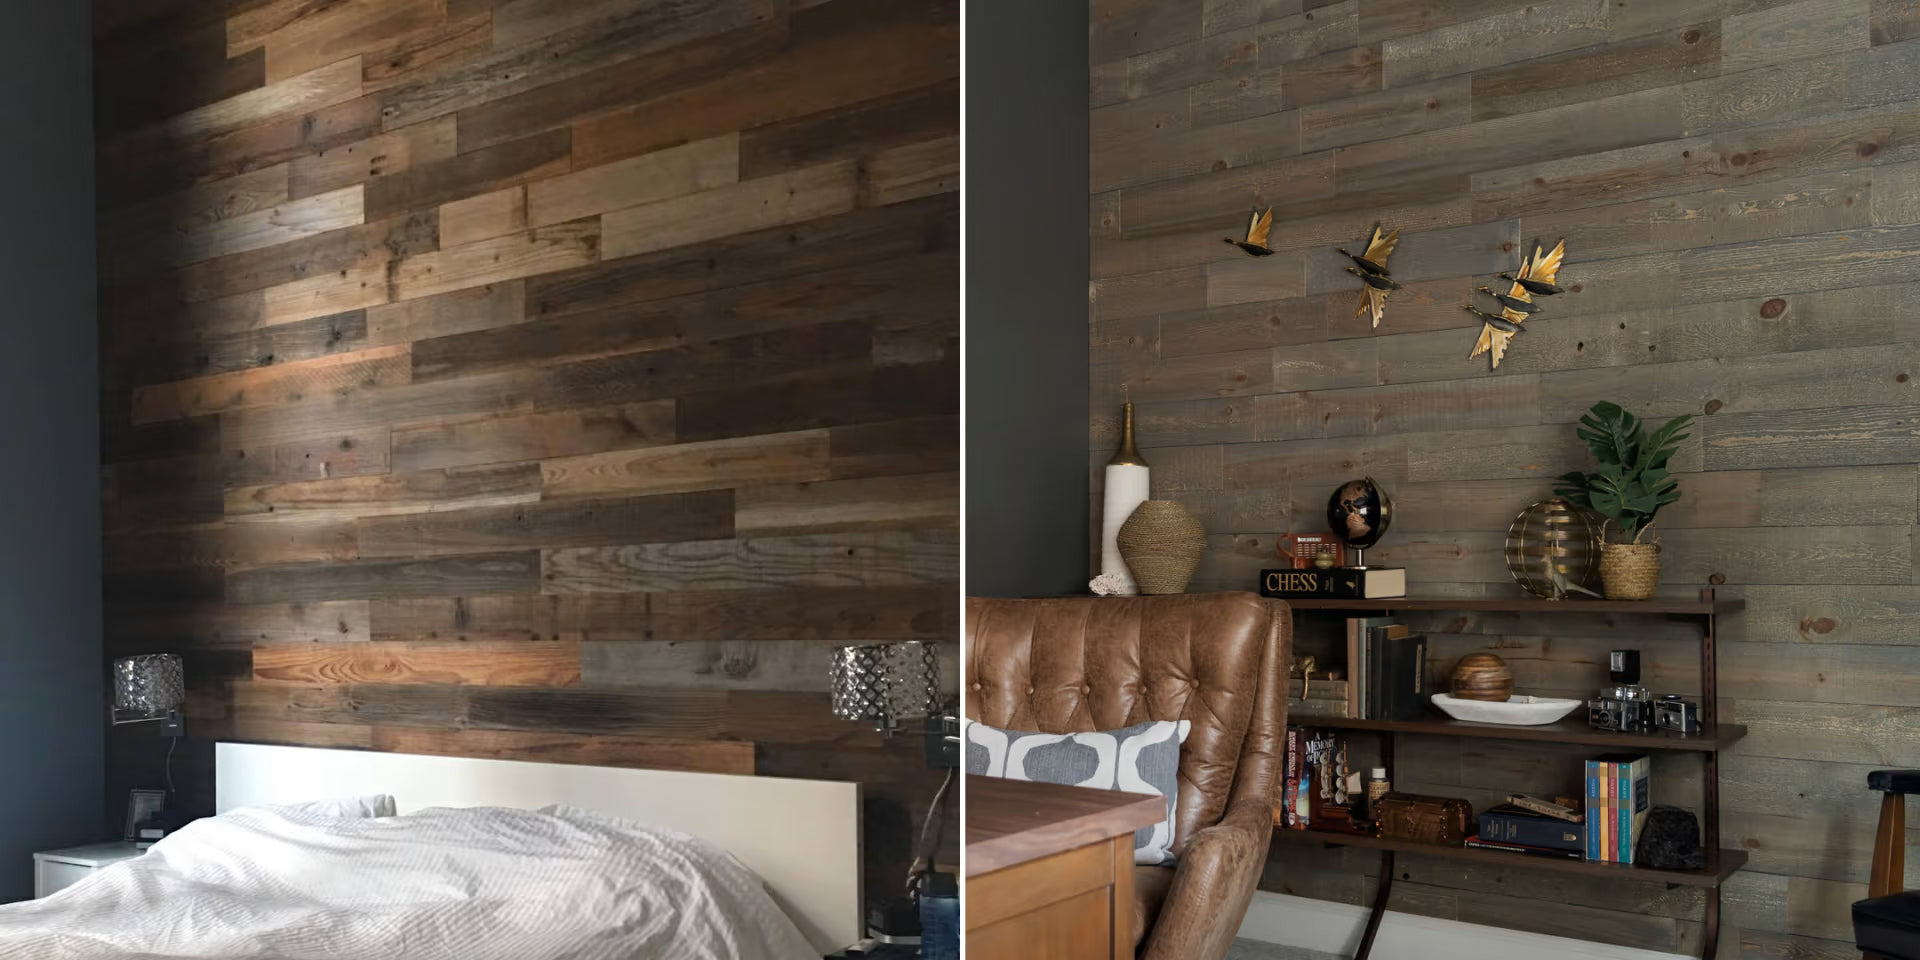
Shiplap is perfect for accent walls, ceilings, or entire rooms. It’s a great way to transform a living space into a one-of-a-kind statement piece you can admire. Here are a couple ideas if you need a little inspiration.

Traditional white shiplap walls are the epitome of farmhouse chic. The clean lines and crisp color brightens up rooms, while keeping them simple and cozy.
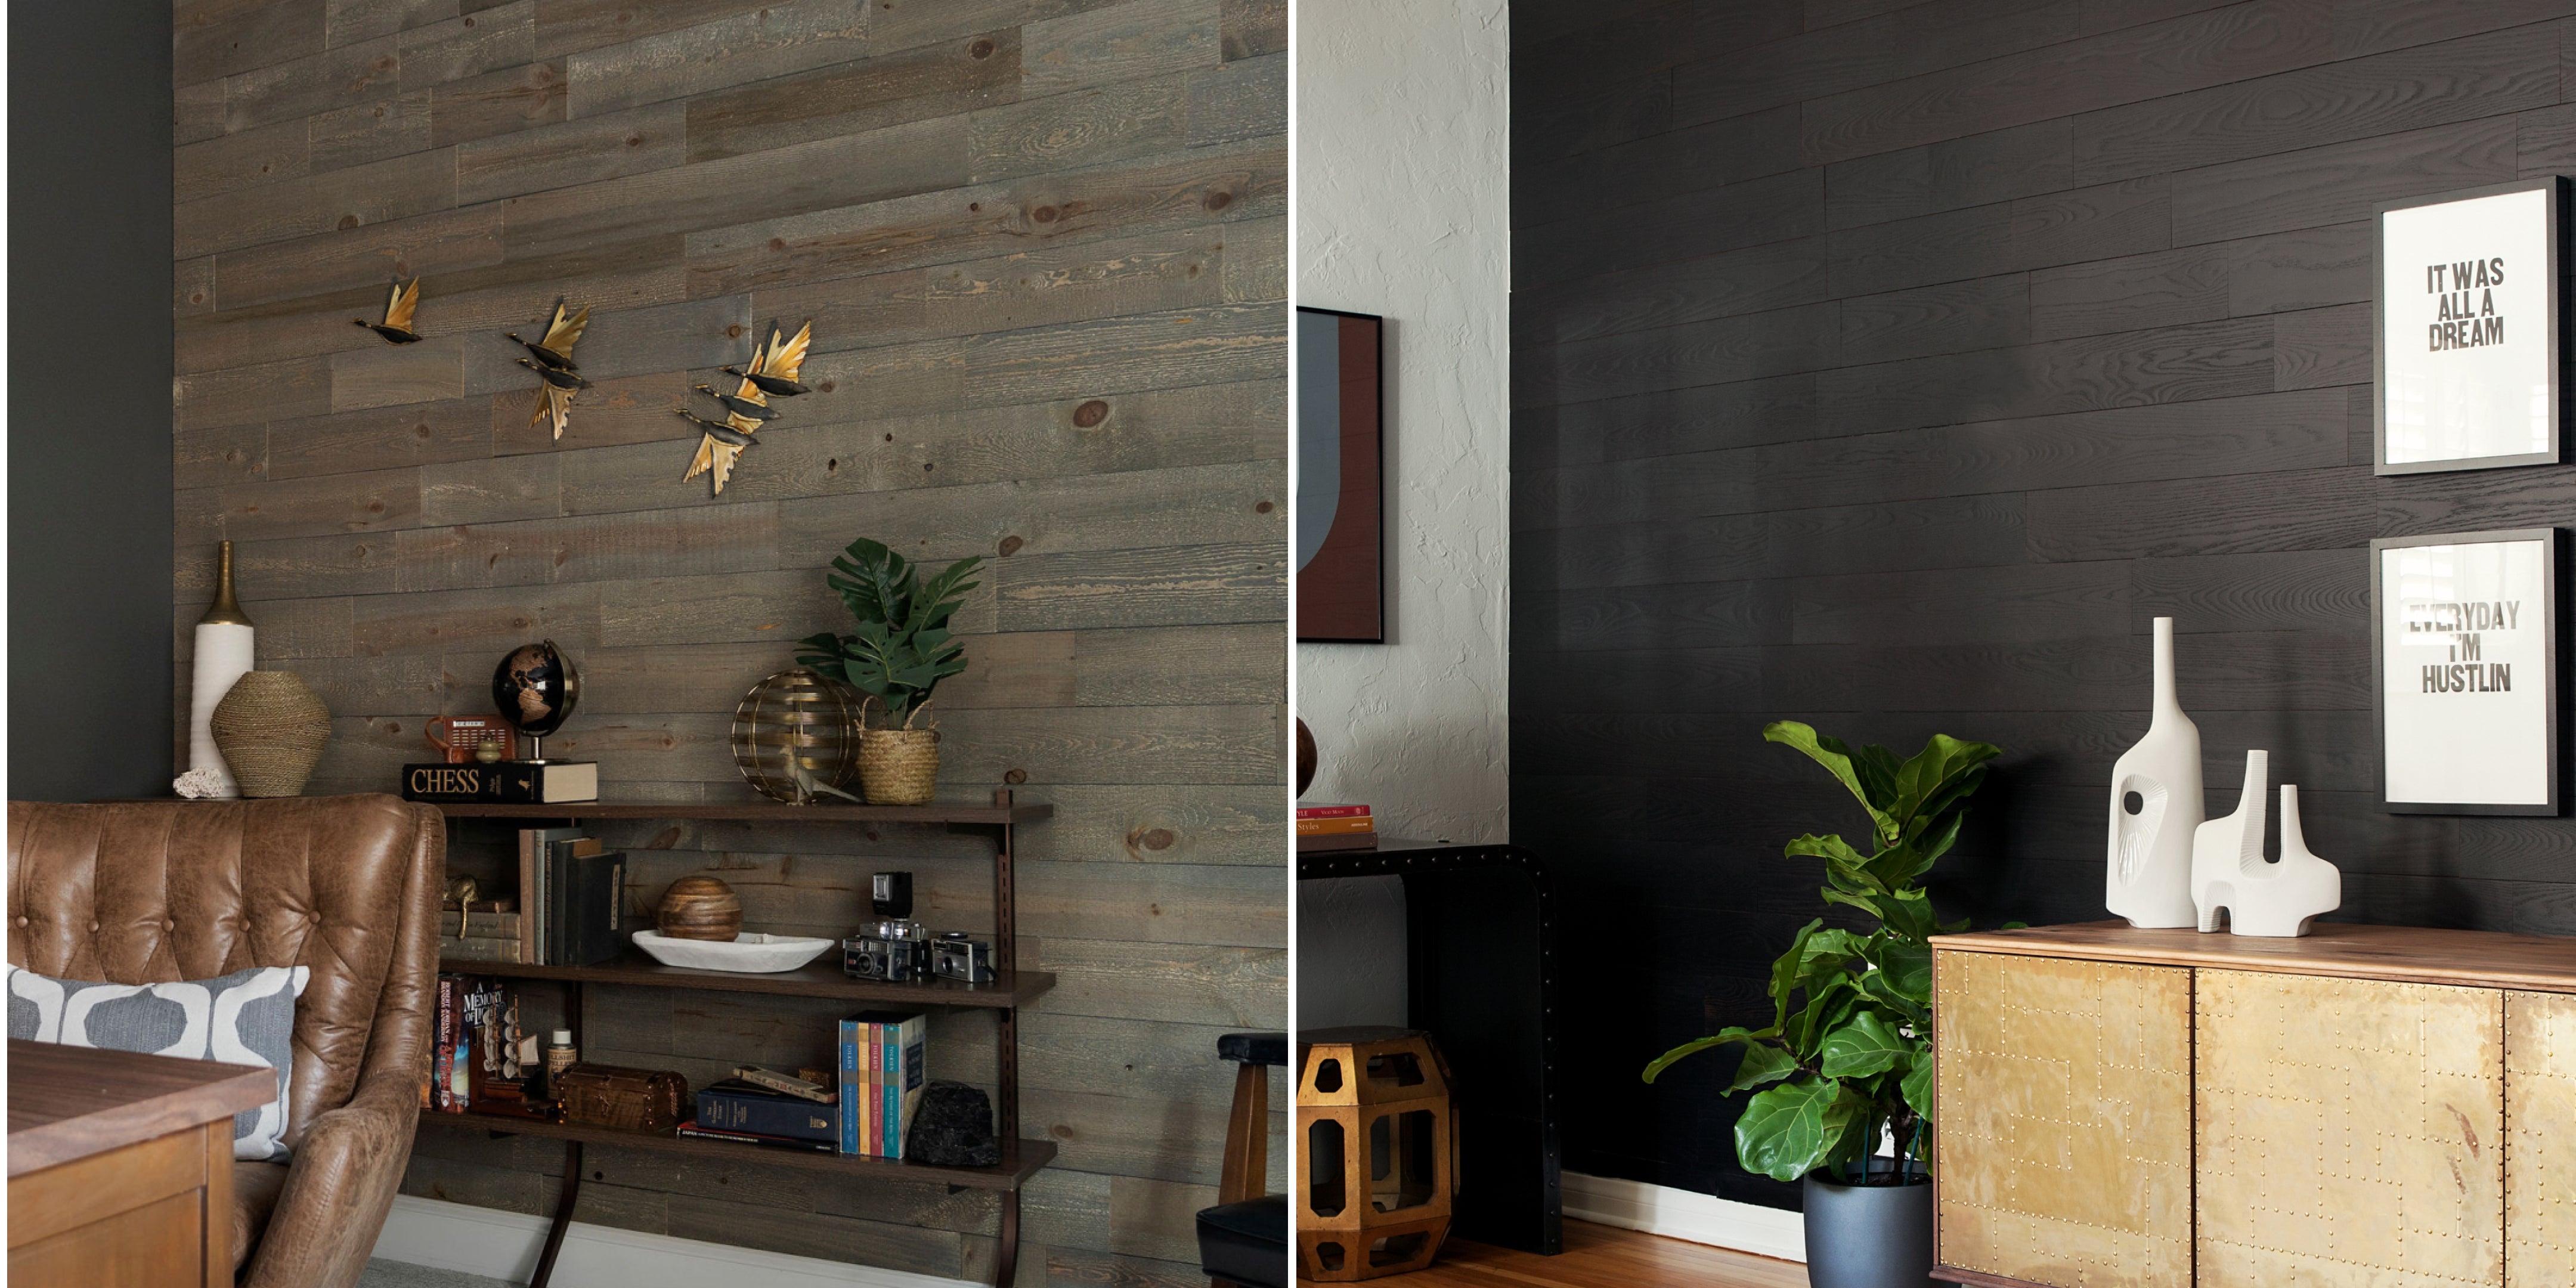
If you’re looking to create an accent wall that won’t detract from other design elements, consider painting with a light gray. Or, stain your boards to preserve their natural beauty.
To add texture without overwhelming small spaces like bathrooms, consider installing half-height shiplap on the walls. This creates an interesting visual break while protecting lower walls from splashes and moisture – especially when paired with exterior grade paint.
Fireplaces surrounded by dark-colored shiplap give off an inviting warmth that’s hard to beat on cold nights. Pair this setup with natural wood mantels for a classic cabin feel, right at home.
If complete wall coverage feels like a bit too much, why not try incorporating shiplap in the kitchen?
Attach pieces of thin boards onto cabinet doors for an instant boost in charm without making major structural changes. Plus, starting with something small is easier than tackling a large DIY project – and might get your feet wet if you choose to expand down the road.
Last but certainly not least, don’t forget shiplap ceilings. The same rules apply here. Stagger pieces for a unique look, and use custom widths to add an illusion of height to smaller spaces.
Absolutely. Use a nail gun to shoot the nails into the tongue of each board, which gets covered by the next piece.
If nails are visible after installation, you can conceal nail holes with wood filler or putty, then paint over them for an undetectable finish.
Sure thing. Using construction adhesive or wood glue along with mounting tape can secure your boards without visible nails. Try peel and stick planks for an easy installation without using power tools.
Liquid Nails is another solid choice when gluing down your boards — just make sure they're pressed firmly onto it until dry.
Embarking on a new DIY project is always an adventure, especially when you’re going for a professional look. Hopefully you’ve gathered a few tips and tricks after reading this article.
We’ve talked about shiplap placement. You know the importance of measuring, cutting, and working around obstacles. And we’ve looked at a few color options to add a finishing touch to your room. Now it’s time to let your creativity shine.
For a peel and stick option that makes DIY shiplap installation easy, check out our reclaimed wood planks. You’ll love the result!


Your cart is currently empty.
Start Shopping
Introducing our easy-to-use visualizer tool that allows you to see every color and finish of Stikwood on your own walls, with the touch of a button.